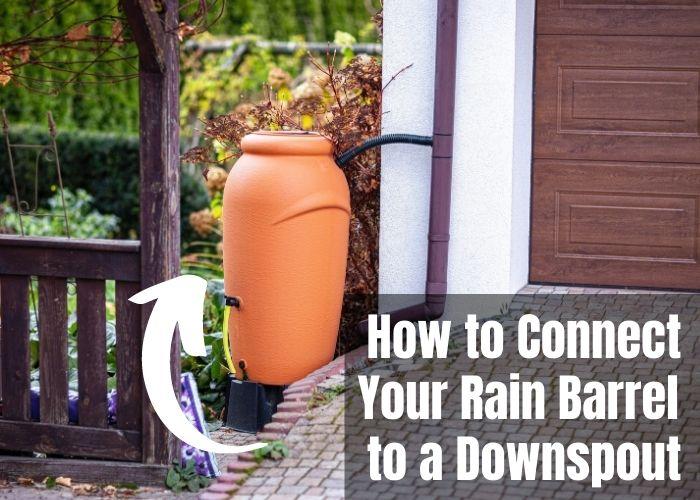
Do you want to connect your gutter downspout and divert excess water to your rainwater harvesting tanks? Check out these easy-to-install rain barrel kits…
How to Connect Your Downspout to Your Rainwater Collector:
With the right tools and a little know-how, you can easily connect a downspout to your rain barrel and start collecting rainwater at home. In this beginner-friendly guide, we will walk you through the installation process step by step, help you avoid common installation problems and give you some maintenance tips too.
Tools Needed to Install a Downspout Diverter:
- Measuring tape
- Marker or chalk
- Hacksaw or pipe cutter
- Screwdriver
- Drill and drill bits
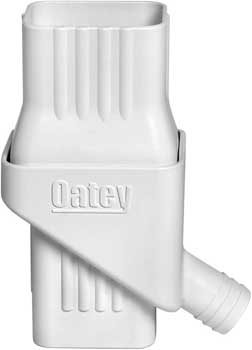
- Diverter kit (like the Oatey Mystic rainwater collection system)
- Rain barrel with a spigot
Step 1: Decide on a Installation Location
Choose a spot for your rain barrel and diverter kit. It should be near a downspout and have a flat surface for the barrel. Also look at the proximity to the areas you plan to water, such as a garden or plants.
Step 2: Measure Where to Add the Diverter
Measure and mark the downspout at the height where you want the diverter to be installed. Ensure the mark is level and centered on the downspout.
Step 3: Cut the Downspout
Using a hacksaw or pipe cutter, carefully cut the downspout at the marked location. Make a clean, straight cut to ensure a proper fit for the diverter.
Step 4: Install the Diverter
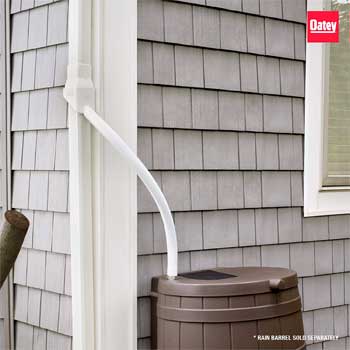
Follow the manufacturer’s instructions to attach the diverter kit to the downspout. The Oatey Mystic rainwater collection system, for example, offers a straightforward installation process. It features a durable design and is known for its reliability and effectiveness.
Step 5: Connect the Diverter to the Rain Barrel
Position your rain barrel beneath the downspout and attach the diverter’s flexible hose to the rain barrel’s inlet. Ensure a secure connection to prevent leaks.
Step 6: Avoid Common Diverter Problems
To maximize the benefits of your rainwater collection system, keep these tips in mind:
- Regularly inspect and clean your gutters and downspouts to prevent clogs.
- Place a screen or mesh over the rain barrel’s inlet to keep out debris and mosquitoes.
- During freezing temperatures, drain the rain barrel to prevent damage from expanding ice.
- Use the collected rainwater for watering plants, cleaning outdoor surfaces, and other non-potable water needs.
A piece of advice from Heather Kincaide-Levario, author of Design for Water: Rainwater Harvesting, Stormwater Catchment, and Alternate Water Reuse, is to check gutters and downspouts about every 6 months (before and after each rainy season) to make sure that there is no debris build up, and if so, flush out debris before connecting to your rain barrel.
How to Turn a Container into a Rain Collection System:
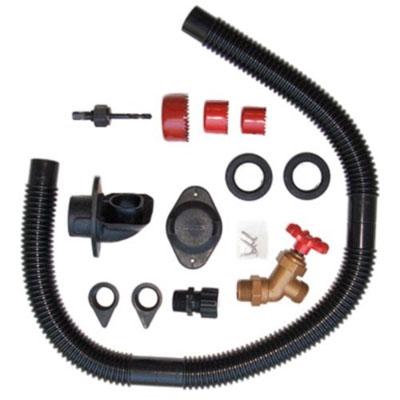
Do you already have your own water collection container? You can simply get a DIY kit that has everything you need to turn your container into a functioning rain barrel system.
Earthminded has a complete kit that includes the diverter pieces to direct water to your barrel – and a spigot to release water when you’re ready to use it. The hole cutters are included as well; you just need a drill to attach them to. A screwdriver is also required.
Pros:
- Even a novice can put everything together in less than 30 minutes.
- Everything you need in one package.
- You can save a bunch of money by building your own rain barrel instead of buying one (or using a custom container that looks cool).
- Ships free.
Cons:
- The spigot is not metal, so may not be as long-lasting.
How to Attach Multiple Rain Barrels Together:
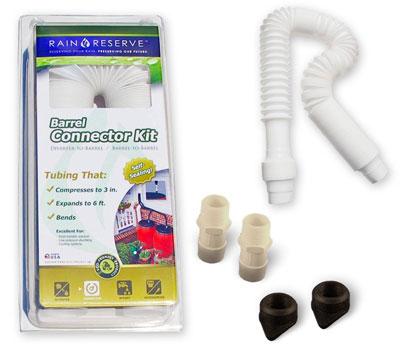
If you have several rain barrels that you want to link together, you will need a connector kit like this one. Basically, the connector takes the water overflow from the first barrel and directs it to the other. It’s pretty straight forward; you just want a kit that is easy to install requires minimal effort and maintenance.
Some Things to Note:
1. This kit from Rain Reserve lets you attach and seal the fittings from the outside of the tank. Some rain barrels may have a removable top, in which case this may not matter to you. However, this is something to keep in mind when looking for connector kits.
2. The special tubing included is expandable to 6 feet, which makes it ideal for curving around corners or other structures.

